We now need to configure the CLI to connect to our AWS account for us to be able to perform operations with services within the cloud, as we need the proper authorization to do so. To do this, we will look at setting up our EC2 instance with the following steps:
We first want to install Git on our EC2 instance. But before that, we will have to update our instance for all the packages that are available. We will be using YUM, which is the main package management tool in Linux systems for installing, updating, removing, and accordingly managing software packages within our system. We also need to use the sudo command, as we need to run the command as a superuser or it will mention that we do not have enough privileges. Run the following command:
$ sudo yum update –y
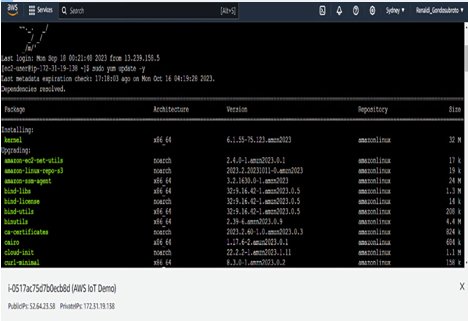
Figure 7.4 – Updating all managing software packages in EC2
Now, we can install Git with the following command.
$ sudo yum install git -y
We now need to install Node.js. To do this, we need to first install Node Version Manager (NVM) using the following command. We need to use NVM so that we can install multiple versions of Node.js and switch between them when necessary:
$ curl -o- https://raw.githubusercontent.com/nvm-sh/nvm/v0.34.0/install.sh | bash
We then need to activate NVM using this command:
$ .~/.nvm/nvm.sh
We then will use NVM to install the latest version of Node.js with the following command:
$ nvm install –lts
We then will test if Node.js is installed properly by running this command:
$ node -e “console.log(‘Running Node.js ‘ + process.version)”
Next, we then will configure the AWS CLI. To do so, we will run the following command:
$ aws configure
We will see several prompts displayed. All this information can be found under your security credentials within your Account Info on the AWS console. If you want the direct link to get there, you can go to https://console.aws.amazon.com/iam/home#/security_credentials.
Enter the AWS Access Key ID, AWS Secret Key ID, and Default Region Name of your account and enter the Default Output Format as json.
Test your configuration to see if you can connect to the IoT endpoint with the following command. If all is done well, you should receive an endpoint address for your AWS account:
$ aws iot describe-endpoint –endpoint-type iot:Data-ATS
With this, we have been able to set up our AWS CLI properly, ready for further development within the cloud. Now, we can look at creating more AWS IoT resources for the EC2.
Creating AWS IoT resources for the EC2
Now, we need to create the IoT resources as part of the EC2:
Within your EC2 Instance Connect window, run the following command:
$ aws iot create-thing –thing-name “MyIotThing”
You should receive a JSON response that looks somewhat like the following:
{
“thingArn”: “arn:aws:iot:selected_region:select_aws_account:thing/TestNewThing”,
“thingName”: “MyIotThing”,
“thingId”: “<YOUR_THINGID_HERE>”}
You now need to create and attach AWS IoT keys and certificates. First, you will need to create a directory in which to store your certificate and key files.
$ mkdir ~/certs
We now need to download a copy of the Amazon certificate authority (CA) certificate through the following command:
$ curl -o ~/certs/Amazon-root-CA-1.pem \
https://www.amazontrust.com/repository/AmazonRootCA1.pem
We then need to run the following command to create your private key, public key, and X.509 certificate files. This will also register and activate your certificate with AWS IoT:
$ aws iot create-keys-and-certificate \
–set-as-active \
–certificate-pem-outfile “~/certificates/device.pem.crt” \
–public-key-outfile “~/certificates/public.pem.key” \
–private-key-outfile “~/certificates/private.pem.key”
We will then receive the certificate as the response. Attach the thing object to the certificate that you have created with the certificateArn that was generated from the previous command with the following command:
$ aws iot attach-thing-principal \
–thing-name “TestNewThing” \
–principal “certificateArn”
Next, we’ll formulate and link a policy. Set up the policy document by duplicating its content into a file named ~/policy.json. If you’re new to Linux and haven’t settled on a preferred text editor, you can launch Nano with the following command.
$ nano ~/policy.json
Paste the policy document for policy.json into the file. Use Ctrl + X to exit the Nano editor and save it.
Create the policy by using the following command:
$ aws iot create-policy \
–policy-name “MyIotThingPolicy” \
–policy-document “file://~/policy.json”
Attach the policy to your virtual device’s certificate with the following command:
$ aws iot attach-policy \
–policy-name “MyIotThingPolicy” \
–target “certificateArn”
With this, you will have created the thing for your virtual device to be referred to in AWS IoT, the certificate to authenticate the virtual device, and the policy document, which will be used to authorize the virtual device to connect to AWS IoT and publish, receive, and subscribe to messages.
Now, we can look at how we can work with the AWS IoT Device SDK for JavaScript to look at more functionalities we can implement.
Leave a Reply